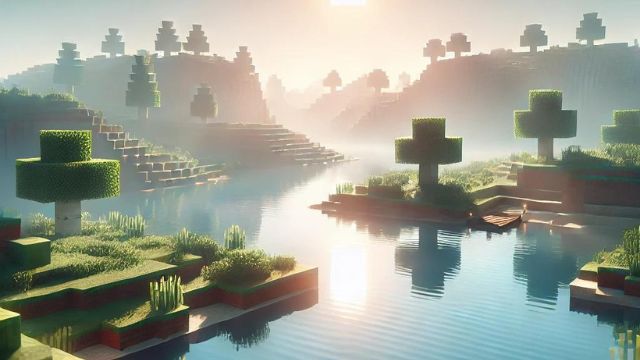
Overview of Minecraft Shaders
Minecraft shaders are graphical modifications that enhance the visual appearance of the game by improving lighting, shadows, water reflections, and other graphical effects. Shaders are designed to make the Minecraft world look more realistic or aesthetically pleasing, transforming the blocky, pixelated graphics into something much more immersive. While the default look of Minecraft is simple and iconic, these mods can bring a whole fresh level of beauty and realism to the game.
Different Types Of Mods
There are several types of shaders available for Minecraft, each offering a different visual experience. Some of the most common types include:
- Lighting Shaders: These shaders enhance the game’s lighting, adding dynamic lighting effects, soft shadows, and realistic light sources.
- Water Shaders: Water shaders improve the appearance of water in Minecraft, making it look more transparent, reflective, and realistic.
- Atmospheric Shaders: These shaders focus on enhancing the atmosphere, with improved skyboxes, clouds, and weather effects.
- Realism Shaders: Realism shaders aim to make Minecraft look as realistic as possible, with detailed textures, realistic lighting, and environmental effects.
Popular Ones!
There are many shader packs available for Minecraft, each offering a one of a kind look and feel. Here are some of the most popular shader packs:
- SEUS (Sonic Ether’s Unbelievable Shaders): Known for its high-quality lighting and realistic water effects, SEUS is a favorite among players looking for a visually stunning Minecraft experience.
- BSL Shaders: BSL offers a great balance between performance and visual quality, with vibrant colors and smooth lighting.
- Sildur’s Shaders: Sildur’s Shaders are highly customizable and work well on a variety of hardware, making them accessible to a wide range of players.
- Chocapic13’s Shaders: Known for its beautiful shadows and dynamic lighting, Chocapic13’s Shaders offer excellent performance and stunning visuals.
Installation
Installing shaders in Minecraft is a relatively simple process, but it requires the use of OptiFine, a mod that improves the game’s graphics and allows shaders to be used. Here’s a step-by-step guide to installing shaders:
- Install OptiFine: First, download and install OptiFine. This mod improves Minecraft’s performance and allows for shaders to be added.
- Download a Shader Pack: Choose a shader pack from a reputable source and download it to your computer.
- Place the Shader Pack: Move the downloaded shader pack into the ‘shaderpacks’ folder in your Minecraft directory.
- Select the Shader Pack: Launch Minecraft, go to Video Settings, click on Shaders, and select your downloaded shader pack.
- Enjoy the Visuals: Start playing and enjoy the enhanced graphics that shaders bring to your Minecraft world!
Compatibility
While shaders can greatly improve the visual quality of Minecraft, they can also be demanding on your hardware. It’s important to ensure that your computer meets the minimum requirements to run shaders smoothly. Players with lower-end PCs may experience lag or reduced frame rates when using more intensive shader packs. However, there are lightweight shader packs available that are optimized for performance while still providing a visual upgrade.
Related Mods
Below is a list of all posts in the Minecraft subcategory under Mods:
[display-posts category=”minecraft-mods” posts_per_page=”10″]
